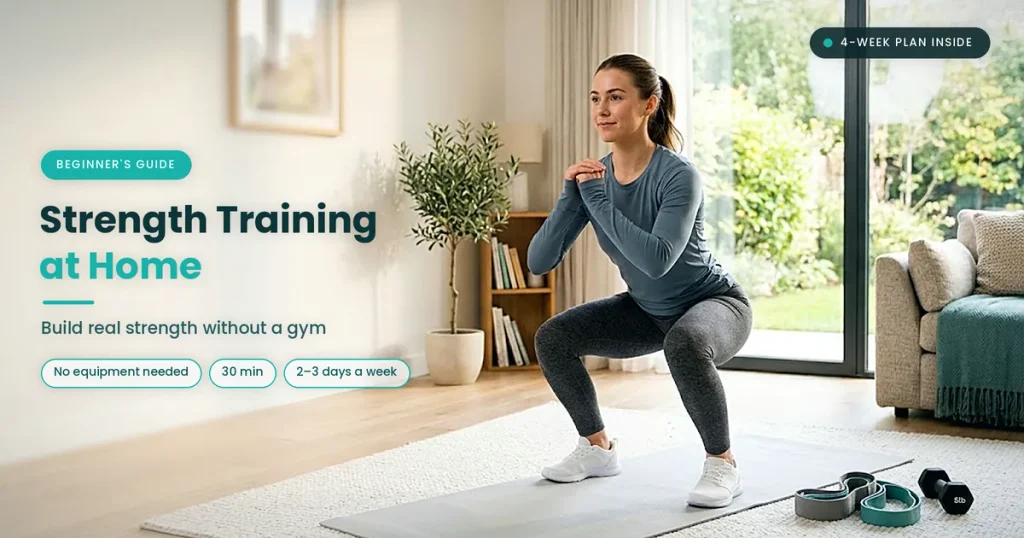
A simple, practical guide to strength training at home for beginners, with equipment tips, 10 essential moves, and a 4-week plan
Picture this. The workday just ended and the gym across town feels a world away. Meanwhile your living room sits right there with a patch of open floor. That patch is all you need. Strength training at home for beginners doesn’t demand fancy machines or a pricey membership. It asks for a plan, a little patience, and about 30 minutes a few times a week.
The need is real. WHO reports that roughly 25% of adults worldwide don’t reach recommended activity levels. Many people skip exercise because gyms cost too much or feel intimidating. A smart home strength training routine removes both barriers. Below you’ll find the equipment, the moves, a beginner strength training routine you can start tomorrow, and the mistakes to dodge along the way.
Quick answer: your beginner’s guide to strength training at home in 7 steps
- Check your health. Talk to a doctor first if you have a medical condition.
- Clear a safe space. A mat-sized patch of floor works fine.
- Warm up for 5 minutes. Cold muscles don’t like surprises.
- Train two to three days a week. Rest days matter just as much.
- Learn six basic movement patterns. Squat, hinge, push, pull, lunge, and core.
- Do 2 to 3 sets of 8 to 12 reps. Stop each set with a rep or two left in the tank.
- Make it harder every one to two weeks. Progress is the whole point.
Why Strength Training at Home Works So Well for Beginners
The Health Payoff of Home Strength Training
Lifting and pushing against resistance does more than build bigger arms. Muscle-strengthening activity boosts bone strength and muscular fitness. It also helps you keep hard-earned muscle while you lose weight. That last point matters if you’re chasing strength training at home for weight loss. Dieting alone can strip away muscle along with fat. Resistance work tells your body to hold onto the muscle.
Daily life gets easier too. Carrying groceries, climbing stairs, and lifting a toddler all feel lighter once your legs, back, and core grow stronger. Think of muscle as the savings account your future self will thank you for.
Time, Money, and Privacy Perks
Home training beats the gym on three fronts. First, you skip the commute. A 30-minute session really takes 30 minutes. Second, you skip the membership fee. Third, you train in private. Nobody watches your wobbly first push-up. Parents can squeeze in a session during nap time. Shift workers can train at odd hours. Students can use a bedroom corner. Easy workouts at home fit around real life in a way a gym schedule rarely does.
Three Myths About At-Home Strength Workouts
- Myth 1: “You need heavy weights.” You don’t. Your own bodyweight offers plenty of challenge at first.
- Myth 2: “Women will bulk up fast.” That doesn’t happen by accident. Building large muscle takes years of focused effort and smart eating.
- Myth 3: “Bodyweight training is too easy.” Try a slow, three-second push-up. Your arms will tell you otherwise.
How Much Strength Training Do Beginners Need Each Week?
The Official Guidelines in Plain English
The target is refreshingly modest. WHO recommends muscle-strengthening that works all major muscle groups on at least two days each week. Which groups count? The seven groups are legs, hips, back, chest, abdomen, shoulders, and arms. Better still, the guidelines don’t require you to train on nonconsecutive days. So two sessions anywhere in your week count.
Baker Heart and Diabetes Institute researcher David Dunstan sums up the newer message: “every move counts.” You don’t need perfection. You need a start.
Sets, Reps, and Rest for a Home Strength Training Routine
Beginners do best with simple numbers. The table below works for almost every move in this guide.
| Variable | Beginner Target | Why It Works |
| Sessions per week | 2 to 3 | Enough stimulus with plenty of recovery |
| Sets per move | 2 to 3 | Builds skill without wearing you out |
| Reps per set | 8 to 12 | A sweet spot for strength training at home for beginners |
| Rest between sets | 60 to 90 seconds | Lets you stay strong on the next set |
| Tempo | 2 seconds up, 2 seconds down | Keeps form clean and muscles busy |
| Effort | Finish with 1 to 2 reps left | Challenging yet safe |
What “Progressive Overload” Means (The Backpack Analogy)
Muscles grow when you ask for a little more than they’ve handled before. Experts call this progressive overload. Imagine carrying a backpack to school each day. If the load never changes, your shoulders adapt and stop caring. Add one book every week and your body keeps adjusting. Strength training works the same way. Add reps, slow the tempo, pick a harder variation, or add weight. More weight or more training days each week leads to stronger muscles.
Before You Start: Safety and Setup for Home Strength Training
Talk to a Doctor First If You Need To
Most healthy adults can begin safely. Still, check in with a doctor if you have heart problems, high blood pressure, joint pain, a recent surgery, or a pregnancy. A quick chat costs nothing. It could save you weeks of setbacks.
Build a Safe Workout Zone
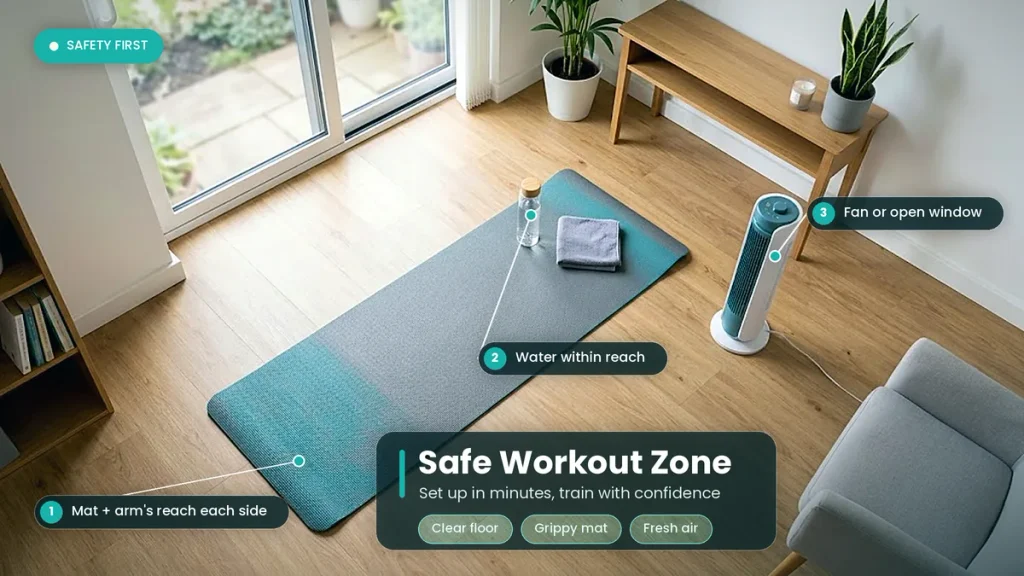
You need roughly the space of a yoga mat plus an arm’s reach on each side. Clear away sharp furniture corners and loose rugs. Hard tile gets slippery, so wear grippy shoes or use a mat. Open a window or switch on a fan. In hot weather, train early in the morning or after sunset. Keep a water bottle within reach.
The 5-Minute Warm-Up
Warm muscles move better and complain less. Try this quick sequence.
- Arm circles: 10 forward and 10 backward
- Hip hinges: 10 slow reps with a flat back
- Cat-cow stretch: 8 slow rounds
- March in place: 60 seconds with high knees
Form First, Weight Later
Sloppy form invites injury. Prop your phone against a wall and record a set. Watch the playback. Are your knees caving in? Is your lower back sagging? Fix those details before adding load. Slow, clean reps beat fast, messy ones every time.
Home Strength Training Equipment for Beginners (Budget to Premium)
Equipment Comparison Table
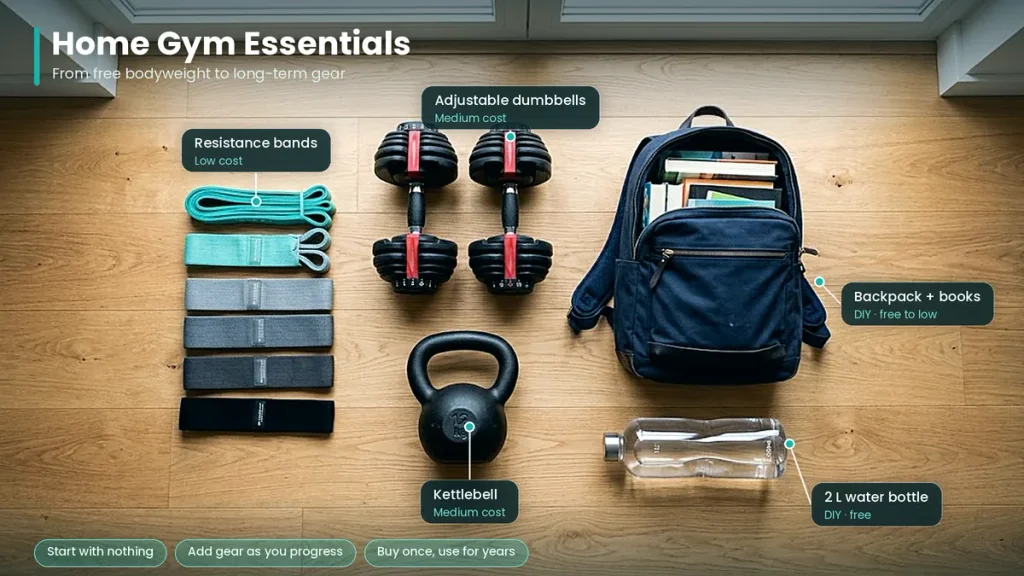
Good news: you can begin with nothing at all. Add gear later as you progress. The table below compares the usual options for cheap home gym equipment.
| Option | Cost Level | Best For | Limits |
| Bodyweight only | Free | Learning form | Hard to load legs later |
| Household items (water jugs, backpack, sandbags) | Free to low | Budget starters | Awkward grips |
| Resistance bands | Low | Pulling and shoulder work | Can wear out over time |
| Adjustable dumbbells | Medium | Long-term progress | Higher upfront cost |
| Kettlebell | Medium | Full-body moves | One fixed weight |
| Pull-up bar | Low to medium | Back and arms | Needs a sturdy door frame |
Smart Buying Tips
Buy once and use for years. Adjustable dumbbells replace a whole rack. A set of bands in several tensions costs little and travels anywhere. Skip gimmicks like vibrating belts or “ab” gadgets. Check secondhand listings too. People sell nearly new weights all the time.
DIY Weights That Actually Work
A backpack stuffed with books makes a fine squat load. A two-liter bottle filled with water weighs about 2 kg (4.4 lb). A sturdy bag of rice or flour makes a decent row weight. Always close bags tightly and test the grip before you lift.
Strength Training at Home Without Equipment: 10 Essential Moves
A solid workout at home without equipment covers the whole body. These ten moves hit every major muscle group. Each one includes an easier option so you can start where you are.
Lower Body Moves
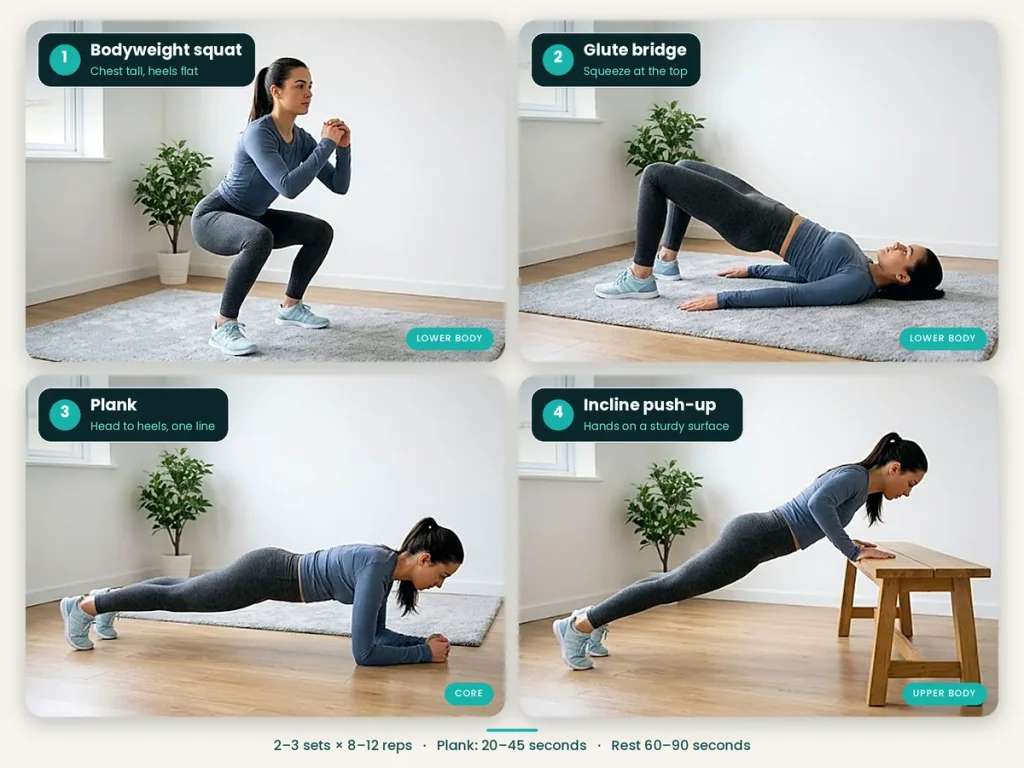
- Bodyweight squat. Stand with feet shoulder-width apart. Sit your hips back and down as if lowering onto a chair. Keep your chest tall and heels flat. Easier: squat to a real chair. Harder: pause for three seconds at the bottom.
- Glute bridge. Lie on your back with knees bent. Push through your heels and lift your hips until your body forms a straight line. Squeeze at the top. Easier: shorten the range. Harder: lift one leg.
- Reverse lunge. Step one foot back and lower until both knees bend near 90 degrees. Push through the front heel to stand. Easier: hold a wall for balance. Harder: add a loaded backpack.
- Calf raise. Rise onto your toes slowly and lower for three seconds. Stairs add extra range. Harder: do it on one foot.
Upper Body Push and Pull Moves
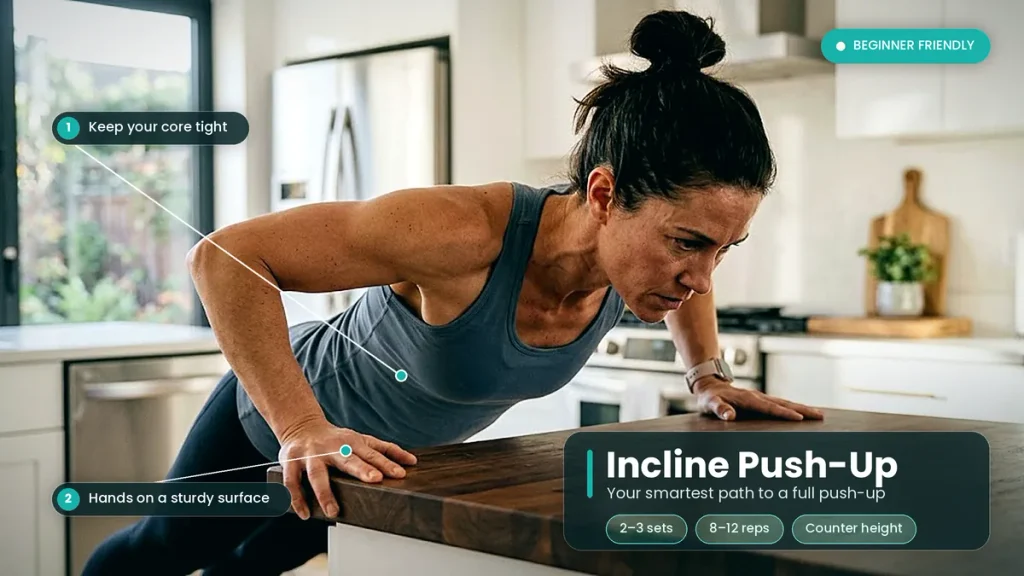
- Incline push-up. Place your hands on a sturdy table or countertop. Keep your body in one straight line and lower your chest toward the edge. Lower the surface over time until you reach the floor. This is the smartest path into a full push-up.
- Backpack row. Hinge forward with a flat back. Hold a loaded backpack by its strap and pull it toward your ribs. Squeeze your shoulder blades together.
- Band pull-apart. Hold a light band at chest height. Pull your hands apart until your arms form a T. This move helps office workers with stiff shoulders.
Core and Full-Body Moves
- Dead bug. Lie on your back with arms up and knees bent at 90 degrees. Lower the opposite arm and leg slowly. Keep your lower back pressed down.
- Plank. Hold a straight line from head to heels on your forearms. Start with 20 seconds. Build toward 45.
- Bird dog. From hands and knees, extend the opposite arm and leg. Hold for two seconds. Move slowly.
Adding Weights: Dumbbells and Bands
Once bodyweight feels easy, load it up. Popular dumbbell exercises at home for beginners include goblet squats, dumbbell rows, shoulder presses, and Romanian deadlifts. Resistance band exercises at home include band rows, banded squats, and overhead presses. Bands bring natural tension that grows as you stretch them. That makes them gentle on joints. Weights and resistance bands both count as muscle-strengthening activity. Either path works.
Your 4-Week Beginner Home Strength Training Plan
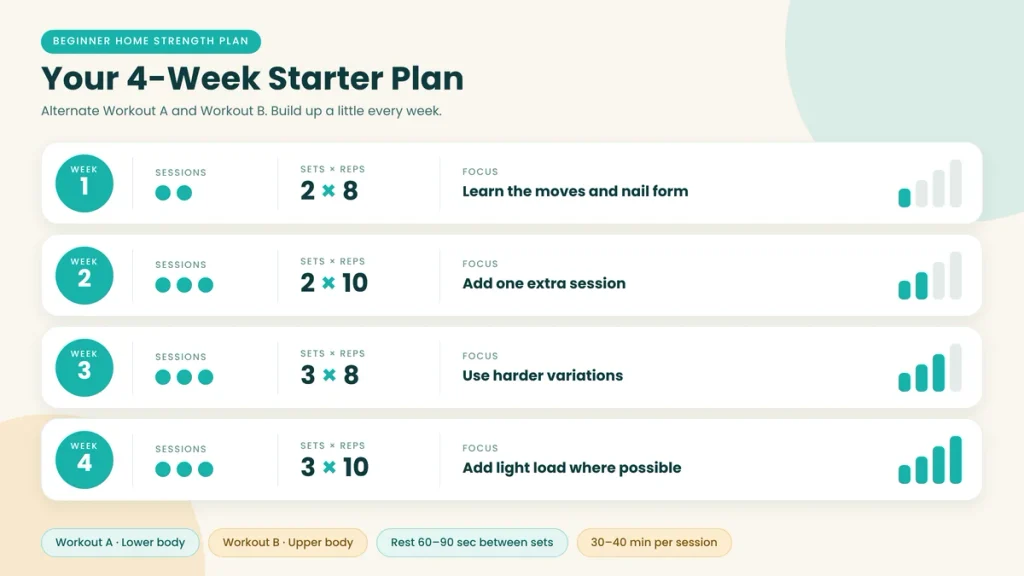
Here’s the home workout plan that ties everything together. It uses two alternating sessions. Do Workout A and Workout B in turn.
Weekly Schedule
| Week | Sessions | Sets x Reps | Focus |
| 1 | 2 | 2 x 8 | Learn the moves and nail form |
| 2 | 3 | 2 x 10 | Add one extra session |
| 3 | 3 | 3 x 8 | Use harder variations |
| 4 | 3 | 3 x 10 | Add light load where possible |
Workout A (Lower Body Focus)
- Bodyweight squat
- Glute bridge
- Reverse lunge
- Calf raise
- Dead bug
- Plank
Workout B (Upper Body Focus)
- Incline push-up
- Backpack row
- Band pull-apart
- Glute bridge
- Bird dog
- Plank
Rest 60 to 90 seconds between sets. A full session lasts roughly 30 to 40 minutes. That makes this a true 30-minute home workout once your warm-up is done.
How to Track Progress Without Fancy Apps
Grab a notebook. Write the date, the move, the sets, and the reps. Note how each set felt. Seeing small wins on paper builds motivation faster than any app. Take a photo every four weeks too. The mirror changes slowly. Photos catch the difference.
How to Progress Your At-Home Strength Workouts
Five Ways to Make Moves Harder
Stuck on a plateau? Try these tweaks in order.
- More reps. Add one or two per set.
- Slower tempo. Lower for four seconds instead of two.
- Longer pauses. Hold the hardest point for two seconds.
- Tougher variation. Move from incline push-ups to floor push-ups.
- Added load. Fill the backpack or pick up heavier dumbbells.
When to Deload and Rest
Every four to six weeks, take one lighter week. Cut your sets in half and keep the same moves. Your joints and nervous system get a breather. You’ll come back stronger. Sleep, too, deserves respect. Aim for seven to nine hours when you can.
Case Studies: What Beginner Home Strength Training Looks Like in Real Life
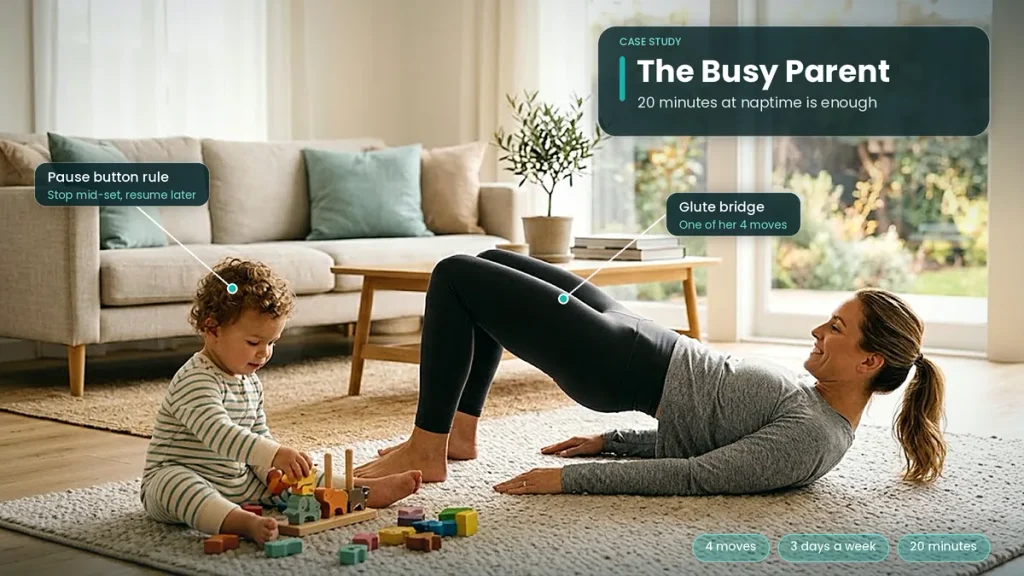
These are illustrative scenarios built from common beginner situations. They show how the plan bends around different lives.
The busy parent. Picture a parent who has 20 minutes during naptime. They skip long warm-ups and pick four moves: squats, incline push-ups, glute bridges, and planks. They train three times a week. The challenge? Constant interruptions. The fix is a “pause button” rule. They stop mid-set when a child calls and resume later. After a month, stairs feel easier and their back aches less.
The office worker. Imagine someone who sits for nine hours and wakes up with stiff shoulders. They add band pull-aparts and backpack rows to every session. Two short sessions a week plus hourly stretch breaks make a visible difference. Their posture improves because they strengthen the muscles that sit between the shoulder blades.
The student in a shared room. Think of a student with almost no floor space. They choose quiet, compact moves: wall push-ups, slow squats, glute bridges, and dead bugs. They avoid jumping to keep noise down. A pair of bands slides under the bed. Consistency, not space, drives their results.
7 Beginner Mistakes to Avoid When Strength Training at Home
- Skipping the warm-up. Cold muscles invite strains.
- Rushing reps. Speed steals the work from your muscles.
- Chasing soreness. Sore doesn’t mean successful. Quality matters more.
- Ignoring rest. Muscles grow during recovery rather than during the workout.
- Doing too much too soon. Eager beginners burn out by week three.
- Copying advanced routines. What works for a pro can wreck a newcomer.
- Quitting after two weeks. Real progress takes about eight to twelve weeks to show.
Fuel, Sleep, and Recovery Basics
Affordable Protein Sources

You don’t need expensive powders. Eggs, lentils, chickpeas, yogurt, milk, and chicken offer protein at friendly prices. Pair them with rice, roti, oats, or potatoes for energy. A balanced plate beats a fancy supplement.
Water and Electrolytes in Hot Weather
Sweat steals fluid fast in summer heat. Sip water before, during, and after training. Add a pinch of salt and a squeeze of lemon to your bottle on very hot days. Train in the cooler parts of the day. Anyone fasting should schedule lighter sessions after breaking the fast and rehydrate slowly.
Sleep as a Strength Tool
Your body repairs muscle while you sleep. Keep a steady bedtime. Dim the lights an hour before. Put your phone across the room. Better sleep often makes the next workout feel easier.
How to Stay Consistent With Home Strength Training
Motivation fades. Habits stay. Pick a fixed time and attach it to something you already do. For example, train right after morning tea or right after evening prayers. Use the 10-minute minimum rule. On lazy days, promise yourself only ten minutes. Most days you’ll keep going. On the rest, you still protect the habit. Mark an X on a calendar for each session. A growing chain of X’s becomes oddly hard to break.
Frequently Asked Questions About Strength Training at Home
Can beginners build muscle with strength training at home?
Yes. Beginners respond quickly to almost any resistance. Bodyweight moves, bands, and a pair of dumbbells all work. Progress comes from steady effort and gradual overload.
How many days a week should beginners train at home?
Two to three days suits most people. At least two days of muscle-strengthening each week matches WHO advice.
Is bodyweight training enough for beginners?
Absolutely, at the start. Later you can add bands, a backpack, or dumbbells so you can keep progressing.
What’s the best equipment for a tight budget?
Start with resistance bands and a backpack. Both cost little and cover nearly every muscle group.
How long until I see results from home workouts?
Many beginners feel stronger within a few weeks. Visible changes usually take two to three months. Be patient and keep logging your sessions.
Is at-home strength training safe for older adults?
Generally yes when done with care and a doctor’s approval. WHO suggests multi-component activity with balance and strength at least three days a week for adults 65 and older.
How do I know if my form is bad?
Record yourself. Look for sagging hips, collapsing knees, or rounded shoulders. Sharp pain signals a problem. Stop and reassess.
Conclusion: Start Your Strength Training at Home Journey Today
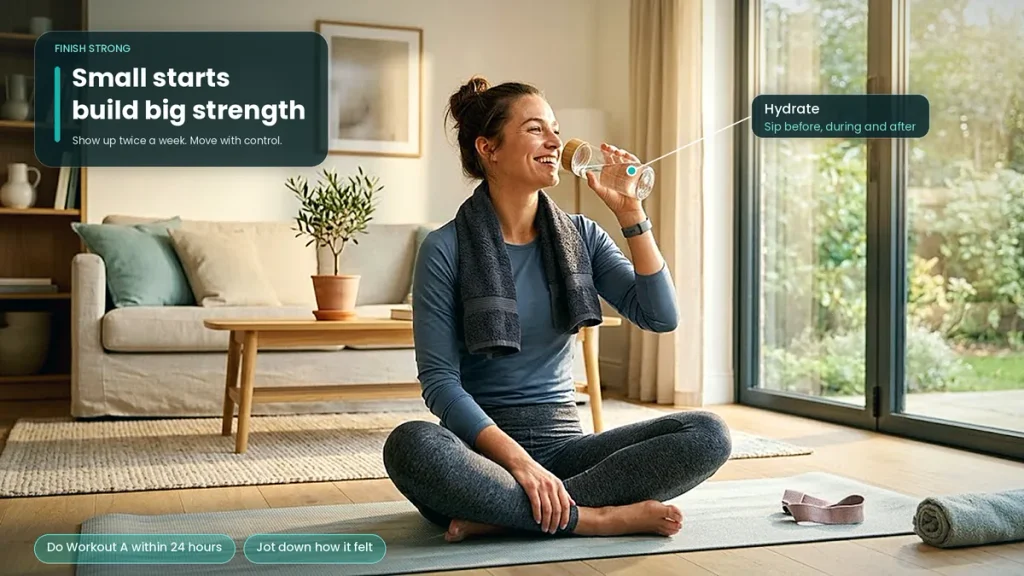
You now hold everything needed to begin. You know the guidelines, the gear, the ten core moves, and a four-week plan. You also know the pitfalls that trip up newcomers. Strength training at home for beginners works because it’s simple. Show up twice a week. Move with control. Add a little challenge over time.
Don’t wait for Monday or a new year. Pick Workout A and finish it within the next 24 hours. Then jot down how it felt. Small starts build big strength.
This content is educational and doesn’t replace advice from a doctor or qualified trainer. Check with a healthcare professional before starting any new exercise program.